Showing posts with label curly. Show all posts

Thursday, October 20

A fun Formal Style...

So first of all, I would like to apologize for not posting lately. My class is getting nice and busy near the end, so I'm all sorts of busy with that in addition to all of the regular mom duties. The end is in sight though! :) 

My niece had her 17th birthday party this weekend, and I had the chance to do her hair. I've started to get into doing coloring, do any of you readers like to dye your own or others' hair? I'm not professional in the least, but I've had fun learning new tricks. I started off with Savannah going to a light golden brown (she's naturally a dirty blond, but she's been dying it lately...) She wanted a fun touch of color, so I added the teal streak.

I started by ratting the crown of her head to make the big bump, then wrapped the hair around and used pins to secure.  I did this while the hair was still straight, so I wouldn't have to mess with the texture on the front part of the style. It worked out great, and then I just curled them with my small Frankenstein curler for a wave style- not ringlets. The curls got more and more wavy and loose, and looked great throughout the night.


 I thought I'd be able to hide the pins, but at the end, I needed a fun accessory to cover them. I tried this big bow, but it just didn't look perfect. I had some netting, feathers, and flowers, so I made this quick clip that looked perfect with her dress. (Sparkly pink and zebra print)


Here she is with her makeup and dress on- so beautiful! Happy Birthday, Savannah!

Sunday, August 28

Simple Curlformers Style...

I really like Curlformers, but have gotten out of the habit of using them. I think it's been a good 6 months at least since I'd done much with them. BUT, they are so nice and really make some cute styles really simply.

I put these in last night, using just some leave in conditioner to moisten the hair, and took them out this morning. I don't usually curl her bangs in with the curlers, but she wants to grow them out, so they're a little long for just keeping in her eyes. Anyway, I just used some bobby pins to pin back her bangs, and separated the girls a bit with some hair spray. Nice and cute! 


Have any of you been to the Lowe's Build and Grow program? I took Emma and Michael for the first time yesterday, and they really loved it! A fun free program every Saturday. They do different projects, and when they finish they give them a cute little patch to sew onto their apron. We're planning to go back again soon.

Thursday, July 14

Special Occasion Hair...

In our religion, kids can choose to be baptized when they are 8 years old. It's a big deal for most kids! Emma had her birthday at the end of June, so her baptism is coming right up. We have a lot of out-of-town family that will not be able to come, so we decided to send out an email with some photos of her in her dress for those that can't make it, and the church info for those that will be able to make it.

This was a really fun and simple style- just a ponytail that was tightly curled and pinned into place. You can see from the pictures that I pushed almost all of the hair to the front of her head since it was only for photos.


Another super fun thing was the headband. I made it myself after seeing some around blogland that I loved, and was really proud of how it turned out. I was a little worried that it would be too much with the netting and the feathers, but it worked perfectly. I'm planning a tutorial on those soon, so make sure to check back for updates!


Friday, April 15

My Favorite Fancy (but Fast) Hair...

So, anytime I do this hair on one of the little girls, I always get comments on how long it must have taken, and how cute it is...little do they know, it takes maybe 5-10 minutes and is great for those days when you need something cute, but fast.

Hope you like it!


Thursday, February 17

Simple Adjustments...

One of the fun things about hair is that just by adjusting the placement of ponytails, it can totally change the look of the do. This one was simple messy buns placed right on the top of Abby's head...A little Kai Lan mixed with some Japanese Anime. :)


Wednesday, January 19

Hello Kitty!


I just had to share this super cute curling iron that I got a little bit ago- The Mario Andriani Hello Kitty ceramic curling iron! The girls have loved it, and even Maia (who has developed a deathly fear of curling irons) will let me curl her hair with "the pink kitty one!"


I love that it has a temperature setting, so I've been letting Emma learn how to curl her own hair on a lower setting so she doesn't burn her little fingers. Plus, the little girls' hair curls on such a low heat compared to mine, so it's nice to have the adjustment.


I found that it curled really well, especially on Emma and Maia's hair, but even on my thicker hair. I was able to find it at Target.com, but if you love Hello Kitty products like my girls do, check out Sparklebee.com- super cute stuff! They even have a matching flat iron and blow dryer!


*This is a sponsored post. 

Thursday, October 7

Picture Day! (Curlformers)

So as with most of us hair-doers, I think for picture day we usually tend to leave hair down, or a little less "creative" than usual. This was the case for us. I was going to do a little braided headband like this one, but then I just decided that I would curl her hair and leave it down. I always remember having really curly hair for picture day when I was little, and I loved it- it felt so fancy!

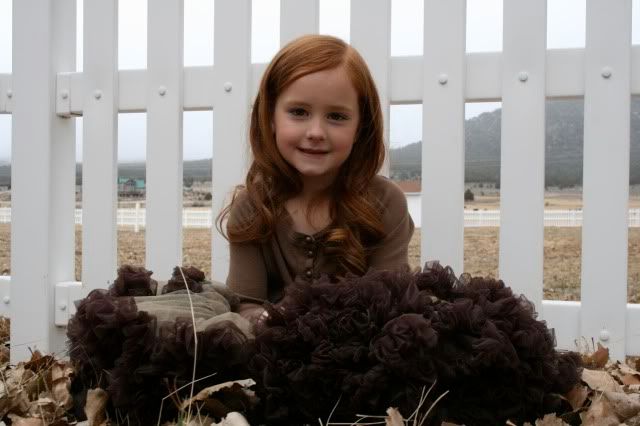
Anyway, we put in the Curlformers last night, using a bit of setting lotion, and she ended up with perfectly curled hair this morning.  One trick that I have learned along the way is to alternate the colors of curler. They curl the hair in different directions, so if you alternate, they will stay separated a little better during the day. (I did it once where I had one big clump of orange curlers, and after a little play time, that section was one huge curl...not so cute.)

Also, I go through and separate the curls a bit using some hairspray so it doesn't look like 12 big ringlets. Hopefully her pictures are early in the morning and not after lunch recess or something so the curls are nice and non-frizzy. :)


I made this cute little headband using some jewels, hot glue, and a bra-strap attachment from the fabric store. Super easy, and really cute for simple hairdos.


Aren't those curls dreamy?? I love them, although I've never put my hair in them yet...someday I'll have a fancy event. :)


Also, I just had to share that after about a year, I FINALLY found the perfect case for the curlers! I had to buy a new set of clippers for the boys' hair, and it came with this little carrying case that was a little too floppy for the clippers, and last night I realized that it was the exact size to hold the curlers. So if you have curlformers, and need some clippers, this might be an incentive to buy this set. :)


And here's the type of setting lotion I use. It really helps to keep the curls in longer, without making them really stiff like hairspray would. (Super cheap too- I think it's only about $4 for this big bottle.) I just use a little spray bottle and spray her hair before adding the curlers.


Wednesday, December 2

Emma's Photo Shoot...

My sister Sydney shot some BEAUTIFUL photos of Emma during our Thanksgiving get together. Nice work, huh?


Since this is a hair blog, I'll talk about her do- I actually curled her hair a lot tighter with the flat iron, but the photographer didn't want it so so curly, so I took the spray bottle, did a soft little mist a few times while pulling down on her hair, and the curls loosened up just perfectly.


Sunday, November 8

Curlformers...

So I love Curlformers. I think most anyone who loves doing hair and who has tried them, loves them. The reason I love them is that they make the most perfect little spiral curls, and they stay in FOREVER. Seriously, they look great all day long, even after hours of playing and running around. So there's my plug for Curlformers. If you don't have them already, I'd highly suggest making the investment. (I got mine at Sally's- I think they were about $7 per package of 6, and we use 2 packages.)

So, here's the do...I usually like to leave it mostly down when I use these, so I just took the front sections and did small braids, tied them together in the back, and then pulled curled sections on top of the braid. I did add this cute flower, but then changed it to a bow when Em had decided what dress to wear. Super cute.

Maia's hair is very simple, just a different take on the simple front-section-pulled-to-the-side hair.

Also, I was going to do a Momma do today, but I ended up just straightening my hair (which takes FOREVER so I usually never do it.) Not so fun for a hair blog. :)


Here are a couple of others that I did using Curlformers- Also, if you do some cute stuff with them, check out Babes in Hairland- she's doing a hairshare using Curlformer dos. :)


Monday, November 2

iCopy iCarly...

So I really don't love that my little girl is growing up enough to watch (and enjoy) shows like iCarly on Nick, but one thing I love about the show is her friends hair (Sam) I love that even though her character is a super tough tom-boy, she always has super cute curly hair. Whoever has the job of curling her hair really takes it seriously- it looks great every single moment of the show- and it makes me jealous. :)

Anyway, When Emma was sick this past week, we were watching the very first episode of iCarly on Netflix, and Sam's hair was super cute, so I copied it. Nice. :)


Sunday, October 25

Flat Iron Curl...

So I know the momma over at Adopt a Do just posted a similar video, but I've been waiting for the right time to do this video, and this morning was it. (Emma is sick, so pardon her not so happy expression.)

Anyway, here's a really simple video on how to curl with a flat iron. Any questions, just let me know! :)

Also, scroll down and enter my first giveaway!


Tuesday, October 20

Snow White...Sorry, no Dwarfs

So I know a lot of little girls dress up as Snow White, and some will have long hair, so I thought I'd show how to make long hair look short and curly. (This is one of Emma's favorite hairstyles because she would like to cut her hair SOOO badly. I don't do it often because she gets so much attention for "cutting" her hair.)

So, first, here's a picture of Emma's hair. You can see that it's pretty long, mid-back, and straight.


To start off with the do, just pull up most of the hair except for a 2-3" section at the base of the neck. Curl this nice and tight with either a curling iron or the flat iron. (I used my flat iron) Then, take each of the curls, wrap them up onto each other and pin them to her head. (these are essentially old-school pin curls.)


Now, let down the next layer, curl tight, and pin. This time though, let about 1/3 of the hair fall from the bottom of the curl before you pin it.


For the top layer, do the same thing, but now let more of the curl fall out of the wrap before pinning. Also, make sure on this section to hide the pins a little more than the bottom layers.


The final step is adding the signature red bow. Now you have a Rapunzel turned Snow White. :)


(As always, please leave me a comment if you have any suggestions! I get all excited when I get comments.) :)
Related Posts Plugin for WordPress, Blogger...