Showing posts with label accessories. Show all posts

Thursday, October 20

A fun Formal Style...

So first of all, I would like to apologize for not posting lately. My class is getting nice and busy near the end, so I'm all sorts of busy with that in addition to all of the regular mom duties. The end is in sight though! :) 

My niece had her 17th birthday party this weekend, and I had the chance to do her hair. I've started to get into doing coloring, do any of you readers like to dye your own or others' hair? I'm not professional in the least, but I've had fun learning new tricks. I started off with Savannah going to a light golden brown (she's naturally a dirty blond, but she's been dying it lately...) She wanted a fun touch of color, so I added the teal streak.

I started by ratting the crown of her head to make the big bump, then wrapped the hair around and used pins to secure.  I did this while the hair was still straight, so I wouldn't have to mess with the texture on the front part of the style. It worked out great, and then I just curled them with my small Frankenstein curler for a wave style- not ringlets. The curls got more and more wavy and loose, and looked great throughout the night.


 I thought I'd be able to hide the pins, but at the end, I needed a fun accessory to cover them. I tried this big bow, but it just didn't look perfect. I had some netting, feathers, and flowers, so I made this quick clip that looked perfect with her dress. (Sparkly pink and zebra print)


Here she is with her makeup and dress on- so beautiful! Happy Birthday, Savannah!

Thursday, July 14

Special Occasion Hair...

In our religion, kids can choose to be baptized when they are 8 years old. It's a big deal for most kids! Emma had her birthday at the end of June, so her baptism is coming right up. We have a lot of out-of-town family that will not be able to come, so we decided to send out an email with some photos of her in her dress for those that can't make it, and the church info for those that will be able to make it.

This was a really fun and simple style- just a ponytail that was tightly curled and pinned into place. You can see from the pictures that I pushed almost all of the hair to the front of her head since it was only for photos.


Another super fun thing was the headband. I made it myself after seeing some around blogland that I loved, and was really proud of how it turned out. I was a little worried that it would be too much with the netting and the feathers, but it worked perfectly. I'm planning a tutorial on those soon, so make sure to check back for updates!


Tuesday, January 18

Super Cute Felt Flowers...

I ran across this cute tutorial on Homemade Ginger a bit ago, and have wanted to give it a go. I had a few minutes today so I plugged in the glue gun and went for it.

The tutorial was great, and the flowers turn out super super cute. I just used a basic craft felt that I had on hand (the ones that come in sheets for around 25¢ ea.) and as you can see, they are really cute. I'll probably make a few more colors for sure, because I love them.


Tuesday, December 14

Anthropologie Inspired...

Browsing through Anthropologie's website is a fun pastime for me. I love looking at the fun hair stuff, as well as the wonderfully beautiful (and pricey) knobs. Anyway, last time I was surfing, I came across this:


Cute, huh? But at $32, I knew it wasn't meant for my little girl's head...So, in comes my cheap make-it-yourself attitude. :)

I just gathered some supplies, black beads left over from the spider project, black felt, and hot glue. (I was going to use the headband, but it was brown, and Emma hates headbands, so I switched to a BIG snap clip.)


Cut circles from the black felt the size that you want the circles. I chose to do one smaller than the other...

I had a video for this part, but it seemed too basic to add it. I just strung the beads, stuck the big jeweled black bead in the center, and then glued the beads in a circle. Repeat for the second circle.


As I said before, I decided against the headband, and went for this big snap clip. (They were huge- I forget where I bought them, I think at a grocery store in Washington, but they were at least 2" long.) I started by gluing a bit of the circle edges together, and then glued them to the clip. As you can see, I'm not so neat when it comes to the gluing. :) 


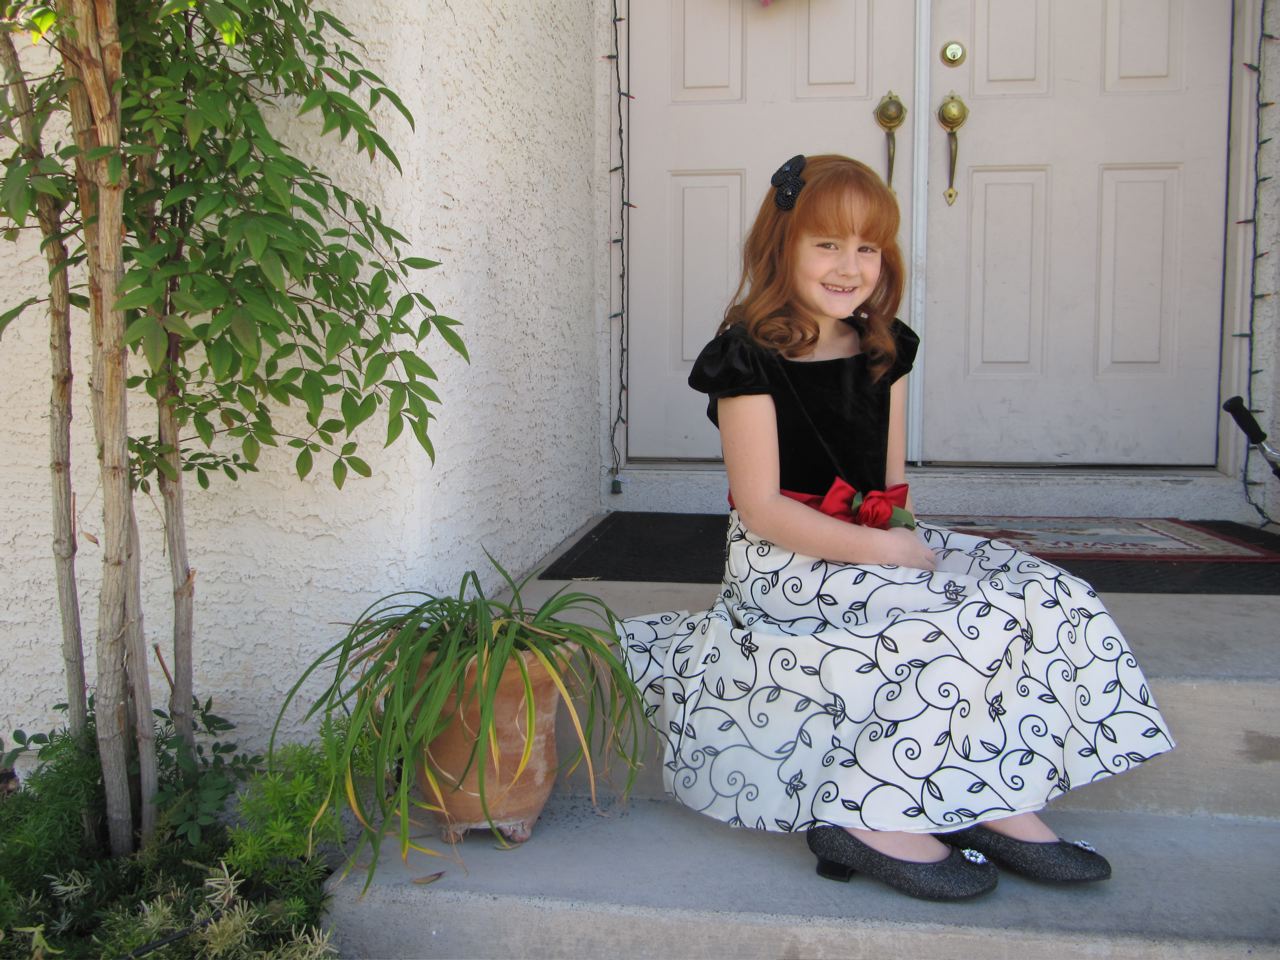
Emma had her first piano recital on Saturday, and she picked out this dress all by herself. (and the shoes! She likes her bling!) Right when I saw it, I knew this accessory would be perfect with the dress. I just curled her hair and clipped this in...


Friday, November 5

A great Tutorial!

I think I'm going to start highlighting some great how-to tutorials for hair accessories. So, if you have published one, or just found a great one, let me know and I'll add it to my list!

I'm positive that most of you have seen these great little flowers around the internet. Most of the time, I see them like this, which are oh so cute:


But take a look at these, where she made them with individual petals instead of circles- they are so amazingly pretty! I love them! Here's the link to the tutorial...Lola Headband


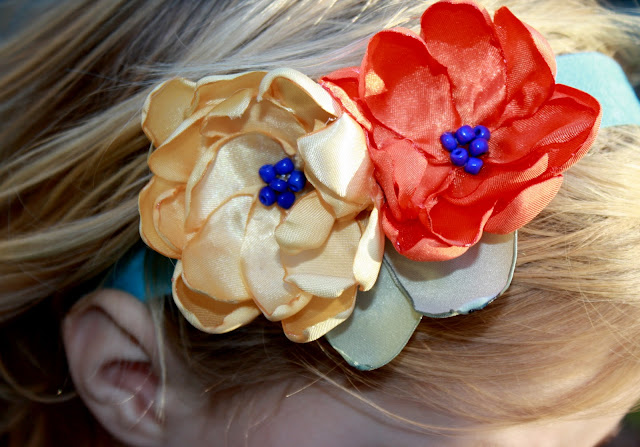
So after seeing this tutorial, off I went to the fabric store. Luckily they had a big sale on their halloween fabrics, which the satin poly was a part of. I got lots of colors for only a few dollars. (I only bought a 1/4 yard of each, since I am not making a ton of them...) Anyway, Here's a version of one that I did in black. Not nearly as cute as the originals...but Emma loved the beads in the center. (I also attached the alligator clip- my girls will not keep headbands in at all.)


 I also tried this one in blue, but I didn't use as many petals, AND I didn't scrunch them up at all, so this is a good example of what not to do...not nearly as cute. :)


(And doesn't everyone craft while making dinner??) 

Wednesday, October 27

Reader Photos! Spider Headbands...

I got a couple reader photos that I wanted to share. Juliet made a couple headbands that turned out oh so cute! Thanks for sending in the photos, Juliet!!


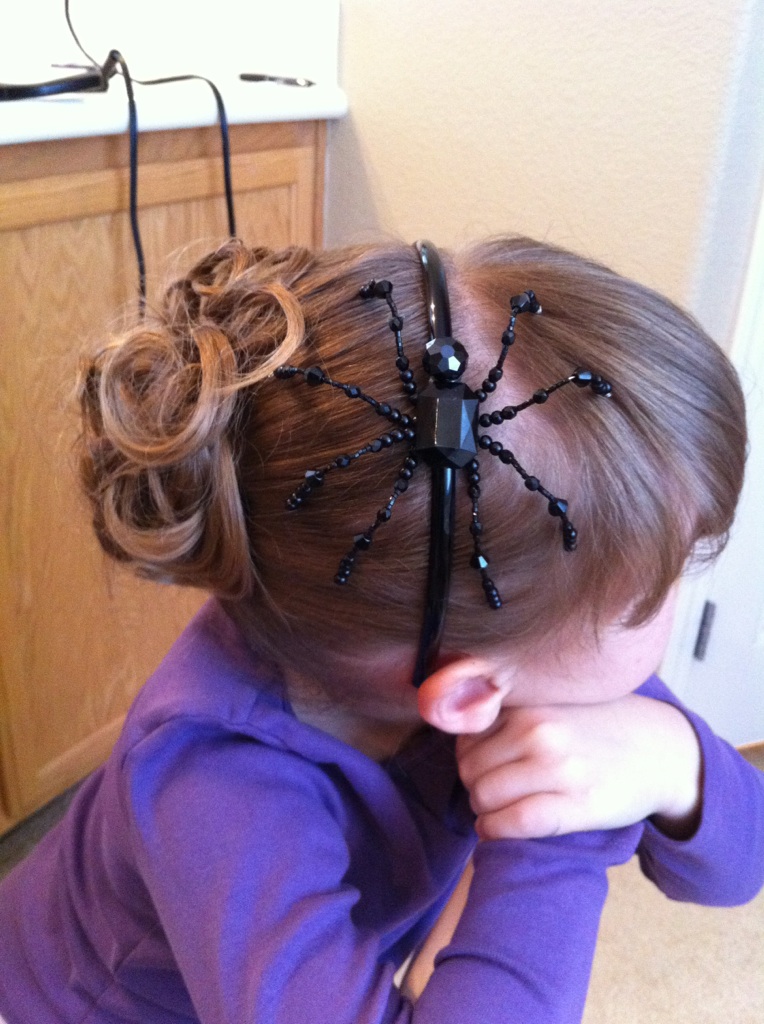
Also, here is Abby wearing the headband that I made- Her mom did a super cute little messy bun. Yay for Halloween! :)

Tuesday, October 26

Spooky Spider Headband...

I shared this link with you yesterday, and here's our version! I made it a little smaller since it was going on a small head, but it worked out really well! (And wouldn't you know- my camera died right as I was taking the last photos- and I can't find my battery charger!)

Here are the supplies I bought-


After gluing the "legs" on, I actually had to change this wire- it was too thick for all of the beads...

We added a little jeweled head to ours...


Monday, October 25

A change of plans...

So apparently after a little surfing this morning, I now have to go to Michaels- I'm almost running out of time to make THIS:

SO CUTE!! Here's the tutorial!

Thursday, October 7

Picture Day! (Curlformers)

So as with most of us hair-doers, I think for picture day we usually tend to leave hair down, or a little less "creative" than usual. This was the case for us. I was going to do a little braided headband like this one, but then I just decided that I would curl her hair and leave it down. I always remember having really curly hair for picture day when I was little, and I loved it- it felt so fancy!

Anyway, we put in the Curlformers last night, using a bit of setting lotion, and she ended up with perfectly curled hair this morning.  One trick that I have learned along the way is to alternate the colors of curler. They curl the hair in different directions, so if you alternate, they will stay separated a little better during the day. (I did it once where I had one big clump of orange curlers, and after a little play time, that section was one huge curl...not so cute.)

Also, I go through and separate the curls a bit using some hairspray so it doesn't look like 12 big ringlets. Hopefully her pictures are early in the morning and not after lunch recess or something so the curls are nice and non-frizzy. :)


I made this cute little headband using some jewels, hot glue, and a bra-strap attachment from the fabric store. Super easy, and really cute for simple hairdos.


Aren't those curls dreamy?? I love them, although I've never put my hair in them yet...someday I'll have a fancy event. :)


Also, I just had to share that after about a year, I FINALLY found the perfect case for the curlers! I had to buy a new set of clippers for the boys' hair, and it came with this little carrying case that was a little too floppy for the clippers, and last night I realized that it was the exact size to hold the curlers. So if you have curlformers, and need some clippers, this might be an incentive to buy this set. :)


And here's the type of setting lotion I use. It really helps to keep the curls in longer, without making them really stiff like hairspray would. (Super cheap too- I think it's only about $4 for this big bottle.) I just use a little spray bottle and spray her hair before adding the curlers.



Thursday, August 19

The "Where's my hairbrush??" Momma Do...

Whenever I am searching for my brush, I hear Larry the Cucumber* singing loudly, "Oh where is my hairbrush? Oh where is my hairbrush??" (If you're not familiar with the Veggie Tales, you're missing out on some very catchy songs.) :)

Anyway, It happens. Some days I just can't find it and I have to fix my hair without a brush. A pain for sure. So here's a good one for those kinds of days...

See, no hairbrush- straight out of the shower.

Start taking messy sections of hair and twisting them. I usually do three twising down on one side, and then three twisting down on the opposite side. Also, I try to not have the part right in the center of my head. For some reason I think it looks funny.

Just in case you wonder how I can hold and twist 6 sections of hair. My mouth is often my third hand when I'm fixing my hair. Add taking photos to that and it was a challenge.

Anyway, once the twists are finished, gather the rest of your hair into a ponytail (twists are still in your mouth at this point) and then pull the twists one at a time into the ponytail and then tie off.


This is a terrible photo, but it shows my hair better than the other one. I take half of my hair, kind of fold it up onto itself and then pin it. I then take the bottom section and fold it down and pin it. It makes a nicer messy bun. The no-brushing actually helps on this part- the hair strands are still sticking together pretty well from being tangled up in the shower.

There ya go. A nice easy do that takes about 5 minutes. I made this little twisty. I thought it would be fore Emma, but it's to big for her tiny little noggin. Lucky for me. :) (Super easy and no sewing! I'll post a tutorial on these soon.


Just for fun, this is what Ruby looked like when she woke up this morning. It was a good day for sure.


*Thanks Julie for the correction! Larry is a cucumber! :)
Related Posts Plugin for WordPress, Blogger...