Showing posts with label non-hair. Show all posts

Saturday, August 13

M.I.A. Again...

So I've been completely ignoring this blog again. I'm hoping once school starts again, we'll have some more styles and different stuff. It seems like we do a lot of braids and ponytails when we just hang around the house.

One thing I did the other day that was a little fun on Emma's french braids for gymnastics was to start them on the top of her head so they would just go straight down her head, instead of curving from the front and going back. Here's a quick shot. Just shows that tiny little changes can make a cute difference on a simple style.


Also, Emma was baptized this past weekend- she did so great, and we had a lot of fun family over to play that Saturday. I had to plan something that wouldn't require any work afterwards, so I went with some braids. Here's a picture of how I finished it- just kind of tied it in a little knot and twisted the ends around to hide them.

In other news, here's a fun project that I've been working on for the past week. I love refinishing furniture, but this was a HUGE job, and really tested my patience. I really loved the end product though, and it was totally worth the work.


Hope everyone is doing well and is having a super fun summer! (Although I know some of you have already gone back to school- we still have 2 weeks left!) I have some fun mom-dos planned for the next bit, and hopefully will have the tutorial up for the cute twisted flower that Emma wore with her baptism dress...they are super fun and easy to make, and you can add them to anything- bobby pins, headbands, ribbons, etc...

Wednesday, August 3

7 Bobby Pins and an iPhone...

Sleeping on wet hair is not good for me. At least I used some product last night so it wasn't a complete frizzball-

I built a little bump using 3 bobby pins. If you have thinner hair, you'd get away with only 2...just make sure to cross them into an x and they'll hold all day. (And I know you can see that really well in this picture.) ;)


With the smaller section of side hair, I just did a regular braid and pulled it back and pinned with two bobby pins over the starting pins...


On the side with more hair, I had to do a twist to keep the front back, and then about 3-4 twists down, I brought that into a simple braid...kind of tricky while taking pictures. :) Pull it back and pin it with the others.


All finished! A cute 7-bobby-pin hairstyle!  (This looks a little poofy from this direction, but you get the idea.)  :) 


I also thought it would be fun to show you my daily makeup. As a mom of 4 kids, 3 of which require hair fixing time, my mornings are pretty short. I've gotten my "face" down to about 5 minutes or less. I use mostly all drugstore products. Here are my favorites:

1. Maybelline Falsies mascara
2. Maybelline brow pencil in blonde (I just found this, and love it.)
3. Covergirl eye shadow brush. I have other brushes, even fancy MAC brushes, and this one is still my favorite. Just a short stubby brush that works great.
4. Almay eye shadow for hazel eyes.
5. Aveeno tinted moisturizer- It's hot here in Vegas, and heavy foundations just melt off of me. This one works great and gives me just the right amount of coverage.
6. Olay face lotion.

And that's it! That's what I use every day. (Well, every day that I actually put makeup on!)

Here's my total drawer- I like these little baskets because when the little girls are getting too grabby with it, I just take them out and put them in my closet shelf. You can see I have more than what I use, and I have more under the counter too, because I like trying stuff. Any suggestions on great products I should try?


 Now, off to my day of freezer cooking!!! Does anyone else do freezer cooking? Any great recipes that you have? I'll post our finished products, but as a teaser, we bought 40 lbs of chicken and 20 lbs of hamburger meat. (for 3 families) Wish me luck!


Sunday, April 3

Virtual Racing...

So this isn't a hair post, but I know many of you moms are looking for a way to get motivated about exercising and all. I've been doing lots of running lately, training for the San Diego 1/2 marathon in June.

Anyway, I was trying to find a 5k to run in Idaho during our spring break vacation, but stumbled upon this fun virtual race...sounds like a good way to combat all those extra sugar calories on Easter weekend. :)

JellyBean Race

Tuesday, January 11

A quickie and Our Door Jobs...

Here's a quick do I had Emma wear last week. I didn't have pictures of the process because I thought I was just doing simple braids that day, but it turned out really cute. I started by doing two simple braids, but I braided them going up instead of down, and then I crossed her head and used a hairtie on each side. I added that little bump, which I thought was super cute. She looks like a little bear. :) The one trick to this was that I had Emma hold one braid to the side while I banded the other side, and then I was able to do the other side.


I had posted a picture a few weeks ago of Emma that happened to be in front of our "door jobs." I had a few emails about it, so I thought I would do a post about my job chart. It's actually worked really well for the last few months, and it was somewhat of an accident that I came up with it. So here's a bit of a long-winded explanation. :)

Last summer I had to think of something fun for the kids to help them get their chores done, and help me to not go crazy nagging them about cleaning. I hated printing individual chore charts, so In came the cleaning game. I had just taken printable business cards, written all of the jobs that needed to be done, and then the kids added a few fun things (5 minute dance party, reading break, etc.) They also really like mopping and windows and dusting, so those were fun ones to pick as well. Anyway, we would just take turns picking a card, and everyone would go to that room to help clean up. We still do that every Saturday. The kids are a little less excited now, but once I ask if they would rather do it alone, they are on board again. :)

So our door jobs came about when one day I had put the cards up on our front door with some disc magnets as a way to keep track of what we had done, and what we were working on. The kids really liked it, so I switched it up a little bit and wrote down a few of their other daily jobs, and so the door jobs were born.

Yesterday I got busy and made them look really nice. The little girls were having trouble because they couldn't read the cards, so I added some random pictures of each of the rooms or tasks. I had most all of them in my photos already, so it was a quick project. I just used the printable business cards to make the white part, and then taped them to the colored index cards and went to have them laminated at our local educational supply store.

So here's the full view of the door jobs. Each kid is listed with their jobs. Emma and Michael have their homework and reading as their jobs, and then Emma has piano and one room, and Michael has two rooms. The nice thing about this process is that the rooms never get really messy when the kids are straightening them up each afternoon. We do the big cleaning on Saturdays, but E&M know to get the vacuum or dust if it looks really bad.


Yesterday I found these super cute sticker charts at Learning is Fun. They have 26 spots, so we discussed it last night and decided that when the kids have it completely filled up, they can turn them in for $6. (It was $5, but Michael is quite a good negotiator.) :)


You can see the pictures a little better here. I used a template in Pages (a Mac version of Word) and think they turned out really cute. The only part I'm still working on is little glass marble magnets that say "Finished" for them to put on top of the cards when they do that job. (We used to just flip them over, but now I stuck magnets on the back of these cards...)


Anyway, the other part of their daily "chores" is their Routines. I got this idea from this post at New Nostalgia I even used the website she suggested for the charts. I did customize ours a bit from what she has, but so far it's worked really great. The kids know what they should do when I say "go do your routines!" and it's easy for me because I'm not constantly nagging them.


They do not get any money for their routines, but I do give them a small candy treat (usually a lifesaver of small candy bar.) if they do it well without me asking or having to remind them.

Hope this is helpful for someone out there. I know I've been through MANY different chore chart versions, and so far, this one has worked the best, and for the longest. Hopefully someone can learn from all of my trial charts. :)

Friday, December 31

Sledding Fun...

I thought I would post this video of what we've been up to the last week. Emma is the last one on the sled- too bad she was busy laughing at her cousin to see what was coming for her! :)  (Sorry for the crazy giggling...I couldn't help it.)


Hope everyone had a great vacation! We're spending the weekend getting ready for school and our regular routine on Monday. Hope that means some good hairdos. :)

Monday, October 25

My New Laundry Room...

So this post is another one that is a little more personal. Today I am officially a student again! I'm starting a masters in education program, so it might be a little hectic around here for the next year or so. Someday I'll need to go back to teaching, and this is a good way to get my mind working again. :)

Anyway, I thought I'd post this one other redo. It was my last major project to finish before starting my first class. The place that I probably spend close to the most time during housework- the laundry room!

Just the basic before and afters, but I'll be posting the full "how to" on my other blog tomorrow. I'm tired. We carved pumpkins tonight- so fun, but busy. :)

BEFORE


AFTER
(Yellow is "Chopstick" by Martha Stewart, Red is "Cherry Cobbler" by Behr)


Ruby checking out the "kids" carving abilities.


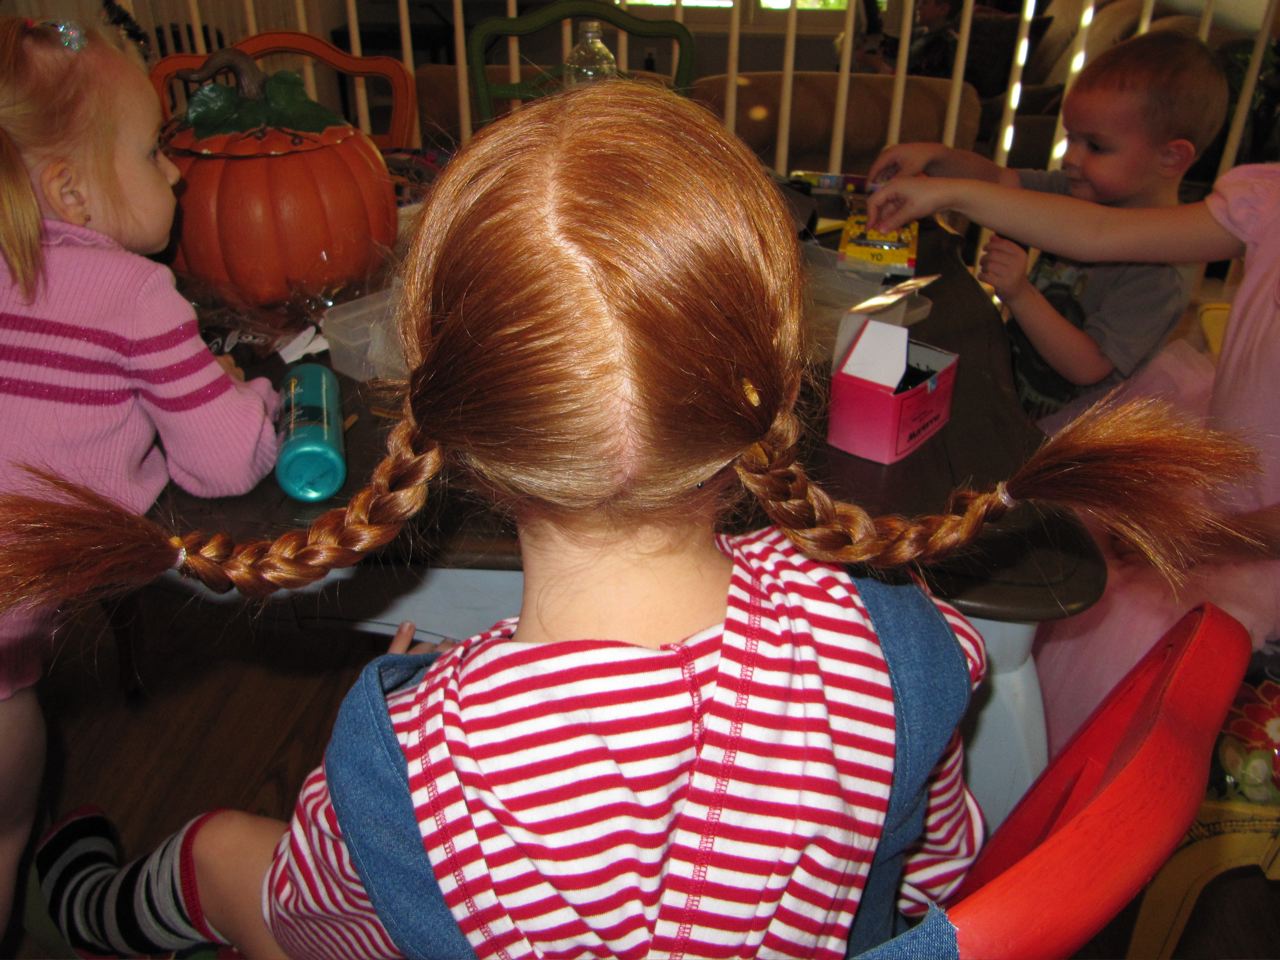
In other super important news, Emma decided not to be Medusa. She said that she was worried she'd scare little kids. :) So sweet. Anyway, for the last few years I've tried to convince her to be Pippi Longstocking, but until she watched the movie, she couldn't be convinced. She finally decided that this was the year to be Pippi! 

 Lots of adults at the school carnival knew who she was, but most of the kids didn't- but they did like her hair! :) (braid one pipe cleaner in with each section of hair, and then bend them- this could work with a lot of different ideas, animal ears, etc.) 


The Three Musketeers! :) 


Tuesday, October 5

Update...and some twisty buns...

So many of you gave me your opinion about the paint color for my dining room.  In true Rachel form, I obsessed about the color for a long time, then went to the store to buy the 3 gallons I needed, and bought a completely new (untested) color! I went with one by Martha Stewart called Slipstream. It was still in the gray family, but had a lot more blue in it than any of the other choices that I had picked up. Here's the before and after of the painting. Thanks so much to all of you who gave me your opinion on the color- I was heading over to get the Porpoise, which I think was the majority winner. :)


 Now back to the hair. This is one that I did for Emma really fast last week. Just simple braided twists (similar to a french braid, but you're just twisting the two sections instead of braiding three.) back into low twisted buns. I've heard these called worm twists- where you take smaller sections and twist them up until they twist up on themselves...Whatever they're called, they're cute, and perfect for wet hair days. :)


(There's actually twist braids on both sides of her head, I just didn't get a picture of the other side.)


Tuesday, August 17

A project for Emma...

I was driving home about a week ago, and on the side of the road I saw this baby, along with some chairs. The little hand written sign said "Vanity $5, Chairs, $2 each." I was so amazingly happy that I had left 3 out of my 4 kids home on that errand, so I rang the doorbell where a super cute little old lady came out and told me that she had this vanity and chairs for over 40 years. CRAZY! I gladly paid her the money, folded down my seats and tucked my find safely in the back. 

After getting it home and doing a little more inspection, it looked like it was 40 years old- if not more. There was multiple layers of chipping paint, green mildewy stuff (under the mirror you can see it) and all sorts of rust on all of the hardware. I almost gave up knowing that it would be a ton of work. That was until Emma saw it. She fell in love immediately, and I knew that I would be in for a big job.


Hi, Maia! (please don't notice her hair- it was a stay-at-home-day.  :) 


(See the other chairs stacked up- she had 6 of them! I'm glad my husband understands my need to refinish things.) 


Anyway, after lots of scraping, sanding, priming, and painting, here she is: 
Emma picked out the colors, and she had the final say in the fabric for the chair as well. I used acrylic paint in the lighter pink, and then used a glazing medium to create my own glaze for the darker pink. 


These little additions were left overs that were in my tool box- they used to be ends of a curtain rod...I think. You can't really tell on the picture, but they are painted silver with some super cute glitter. Just a little added bling. :)


I LOVE this fabric. I got it in the clearance section at the fabric store- only 2.99/yd for upholstery fabric. NICE! I'm glad Emma liked it since she was doing the actual "picking"

This little guy was found at the D.I. for $1. I did this before I finished the vanity or I probably would have used the same colors, but it works well in the room anyway.


Now, anyone have any suggestions on how to get Emma to sleep in her own room? She has slept with her brother for his entire life, so she's a little anxious about it. Not to mention that she's on the bottom floor when the rest of us are on the top. Please someone have some advice. I need it...

I promise I'll do some hair posting this week! 

Sunday, June 20

Repurposed Kitchen...(Not a Hair Post)

So I know I've been slacking on my hair posts this week, and this is the reason why. As I said before, we had Emma's birthday party today, so I had to get this project finished this week, which took all of my extra time. I thought that since most all of you are moms of little kids you might appreciate this idea and maybe make one of your own- Also, just a disclaimer, this idea was not original. I was inspired by Sutton Grace and her cute little kitchen redo.

So, here's the process- start out by finding a good entertainment center. I had to find one that was big enough for Emma, but not too huge. I still had trouble finding a place to put this in our house where it wasn't in the way. I really lucked out as I had just told my husband about my idea and he emailed me that same day saying that a co-worker had a nice oak one she didn't want anymore. It was destined to be my little kitchen. :)

Start by removing all hardware and priming the piece.


This is the primer I used, and I was really impressed with it- super easy to clean up, and really nice coverage. 

Paint the main color of the kitchen- you cant really see here, but the sides and top are all this blue color, as well as the insides of the cabinets. 

Here shows the counter tops and cupboard doors painted purple.

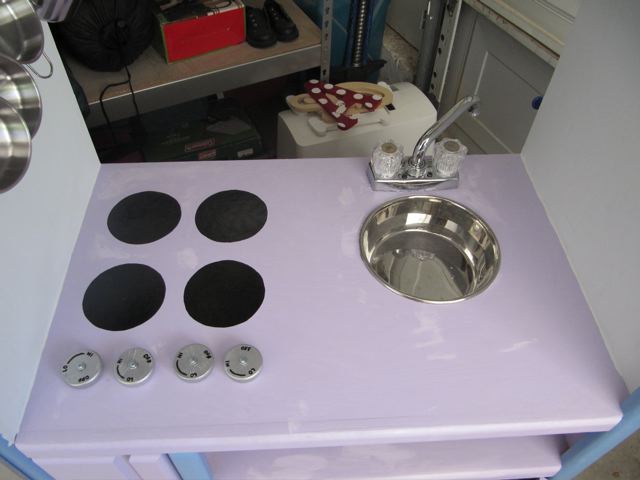
It comes in handy when you're using powertools for the first time to have someone there as backup that can handle the need-to-be-exact-or-the-project-is-ruined cuts. Here my Dad helped me do the circle for the sink. (It's actually an old stainless steel dog bowl that we had around)

Next we cut some pieces of 1/4" MDF for the fridge and oven doors. I wanted them to be lightweight but still a little tough, and this is what I had in my garage. I purchased the handles and the oven knobs (closet rod hangers) at the Habitat for Humanity Restore here in Las Vegas, which is a really fun store for building materials. 

I was searching for a faucet, but didn't want to spend a ton of money on one, and eventually I gave in and bought this one. It was labeled as a "Laundry Room Faucet" at Lowes, and was about $17 or so- the most expensive purchase for the project. I tried to epoxy this as well, but it was kind of loose, so I got a little tough with it by adding a couple grabber screws in the front. 

I debated on the color of the fridge and oven for a while, and eventually decided on spray painting them silver to look like stainless steel. I already had these attached (not thinking ahead as usual) so I put a sheet behind the doors, but over the rest of the project before I painted. I still got some on the blue around the hinges, but that was easy to retouch. 


I found this acrylic sheeting at Lowes, and thought it was perfect for the oven door. It has that film that comes off, and it's nice and clear. I just used an epoxy to glue this into place, as I didn't want too many screws for little body parts to scratch on. 

I used a high-gloss black paint for the burners. (and inside the oven as well.) This was another thing I searched for something circle that would look nice as a burner, but then I just decided that I would paint them on. I think it looks good, and if they ever get scratched up, I can just retouch them without having to replace anything. 

Make sure to watch your paint bucket carefully. Little babies are sneaky. 

The fridge and oven didn't stay closed completely, so I added these little magnetic closures. 

Painted on the controls for the stove

Retouch any scuffed or scratched parts

Professionally hang some frames for your little one to draw some photos for (I say professionally because it took me 3 tries to get them in the right spot. Luckily the other nail holes are behind the frames.) :) 

Surprise your little birthday girl with the project in the garage that she couldn't see for 4 days, and you've got one happy little bug. Emma's wanted a kitchen for a long time, but I didn't want to buy a cheap plastic one again. (We've already had 2 in her lifetime that somehow got broken) This was the perfect alternative. Reusing something old, and making something that will actually last for a long time. 

I found all of the dishes and other accessories at Walmart. I eventually want to make a bunch of felt foods, but that project will have to wait for a few weeks. I'm a little tired. :) 


Related Posts Plugin for WordPress, Blogger...